Perth to Sydney, which route is best?

Most people believe the challenging drive on this journey is the 1200km Nullarbor section between Norseman and Ceduna. As far as EV charging goes it requires patience and planning plus a relaxed attitude to food and accommodation choices. This article is not focussed on the Nullarbor, but driving from Port Augusta to Sydney which has 3 different routes with plenty of DC charging options but a whole different set of challenges. For Nullarbor information see So You Want to Drive an EV Across the Nullarbor.

The absolute almost failure proof route is in the Deep South via Tailem Bend and Ballarat, it’s far longer but has much better services along the way. For those that are a bit fussy take this route.

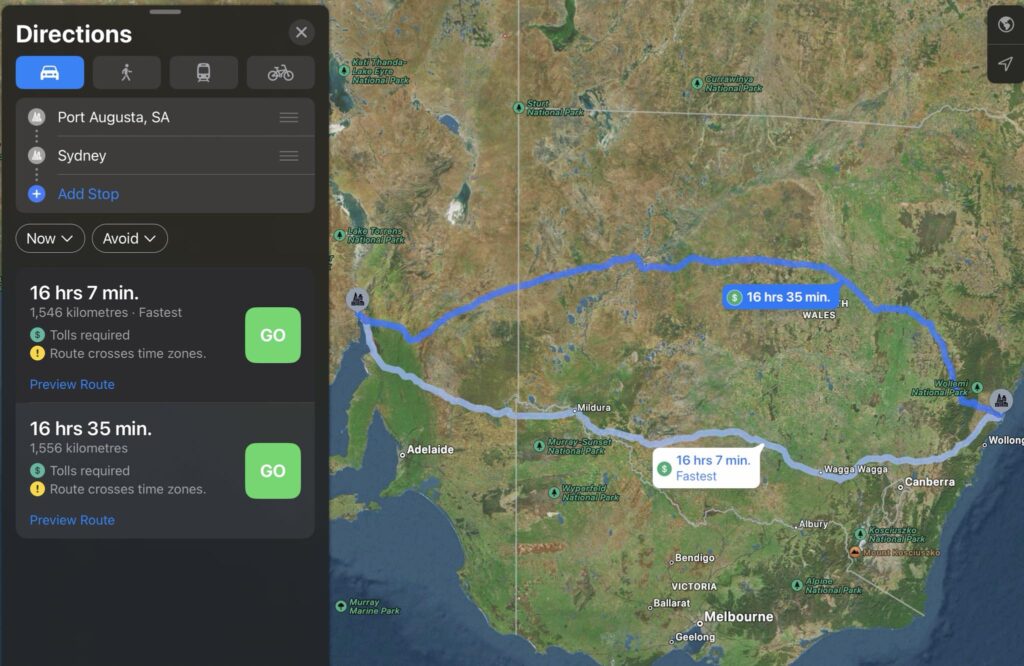
The most common route and shortest is via Mildura and Wagga Wagga, there’s no need to charge from anything but the reliable RAASA network and Tesla Superchargers thus avoiding the troubled NRMA network. The distance from Port Augusta to Sydney is 1546kms with a fairly reasonable choice of food and accommodation services, the downsides to this route is a large volume of traffic including time constrained heavy haulage plus the poor condition of various sections of highway that should be in far better condition. On this route you won’t get charger anxiety but may end up with pothole anxiety.

The 3rd and most northerly route is via Broken Hill and Dubbo, at 1556kms it’s only 10kms longer than the central route but has one potential hurdle so I’ll get to that first. The 414km drive between Port Augusta and Broken Hill is covered by reliable RAASA DC chargers at Wilmington and Peterborough, the last 392kms between Dubbo and Sydney is Tesla Supercharger territory, the potential tripping hazard is the 753kms between Broken Hill and Dubbo due to a need to rely on the NRMA DC network, most NRMA sites only have one charging cable, there’s no idle fees, and there’s no back up type 2 as is standard on the RAASA and WAEV networks. If you arrive at an NRMA DC charger and it’s out of service or blocked by an inconsiderate EV driver plugged in but not charging you have to find your own plan B. I don’t have much faith in the NRMA to make a few simple improvements but I do have hope that the Tesla Supercharger network will extend west of Dubbo, when that occurs it should be the preferred route.

Despite having to deal at some stage with the NRMA I highly recommend this route as a once-off opportunity to explore Peterborough, Broken Hill, Silverton, Cobar and Nyngan so here are a few tips to drive this route:

  • The NRMA app is poor, luckily charging can be started via the Chargefox app, I use this method always.
  • Plan at least one and possibly 2 nights at Broken Hill, there’s plenty to see including a short drive out to the Mad Max 2 museum at Silverton, the Pro Hart Gallery, Bells Milk Bar for a Lime Spider, the Palace Hotel for dinner, and of course the mining history of the area. Take note that Broken Hill is in NSW but operates on the SA time zone.
  • When departing east from Broken Hill leave as early as possible and make sure you have a 100% charge to reduce charging downtime at Wilcannia, from October to April Wilcannia can get extremely hot, the NRMA 50kW chargers are a bit too far from any shops and lack shade, a 30 minute charging stop at 9.00am is bearable, anything else in Summer is not.
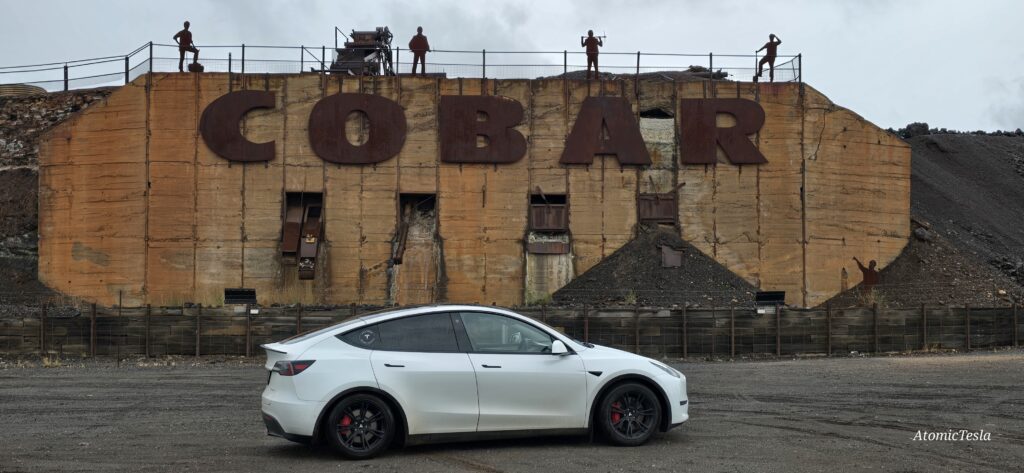
  • Lunch at Cobar is recommended, plenty of history to take in.
  • Nyngan has an interesting Helicopter monument that’s worth visiting while charging. Also a handy overnight stop before a final day drive to Sydney. 

If your destination is the Central Coast or Brisbane rather than Sydney the route via Broken Hill is the better option.

If you have the time to plan ahead you could try the Broken Hill route heading east and the Central route on the return journey.

Starlink Mini for Travel review – by James Maitland

For those wondering about portable internet on the go, we’ve been using the Starlink Mini (about $780) while travelling we were going to purchase the original as it is much cheaper and can get faster speeds, but the mini does not need a separate router and does fine for us. It runs on low voltage (20-60V DC), making it versatile with different power options. The default 5525 barrel connector cable is 15m long and works well, but it’s not always easy to find compatible power sources.

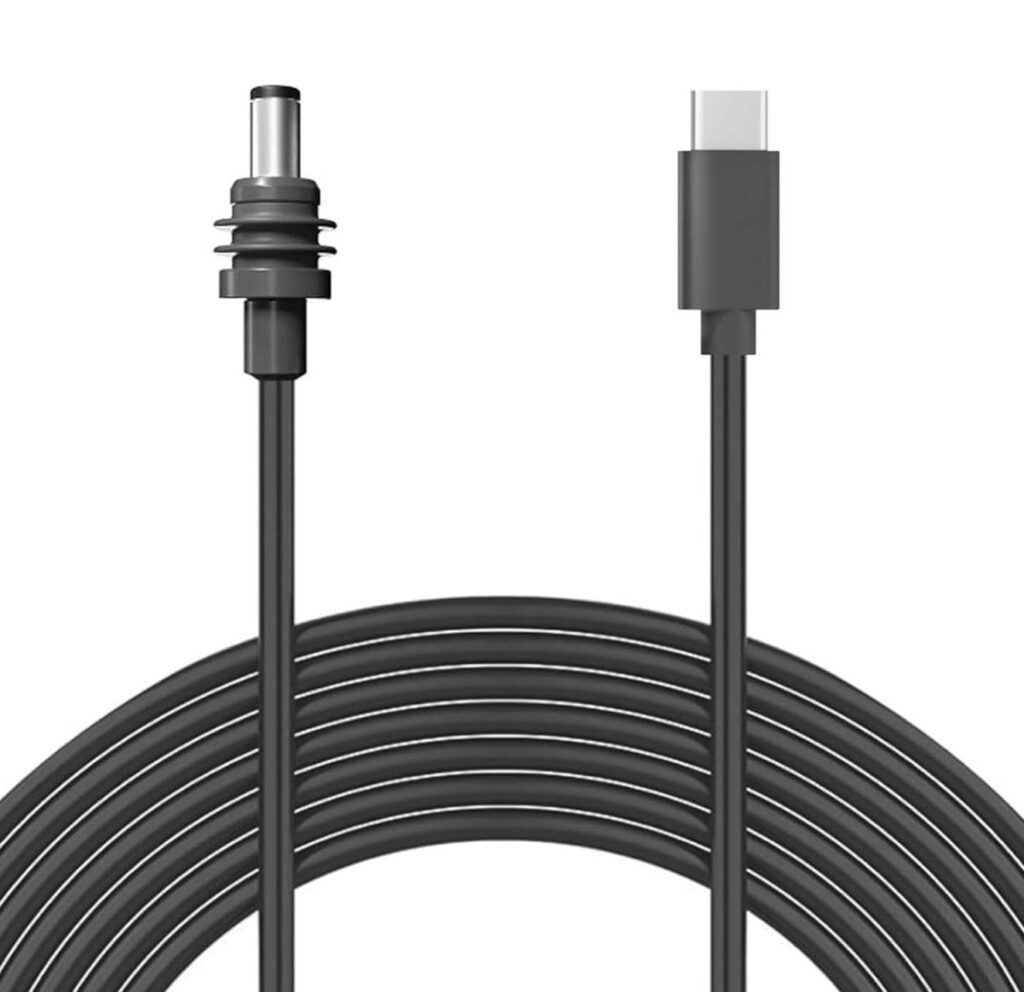
Luckily, we found a workaround with a third-party USB-C cable from Amazon (around $30), which runs off any USB-C Power Delivery (PD) socket. This has worked flawlessly to power our Starlink Mini from our car’s socket with a PD adaptor, which also we use to charge our MacBook or ipad with no need for any inverter. The Starlink only needs about 25W-50W, so the 100W-rated USB-C cable is more than enough. The trade-off is that the USB-C cord is only 3 meters, compared to the original 15 meters, but it’s perfect for use in the car.

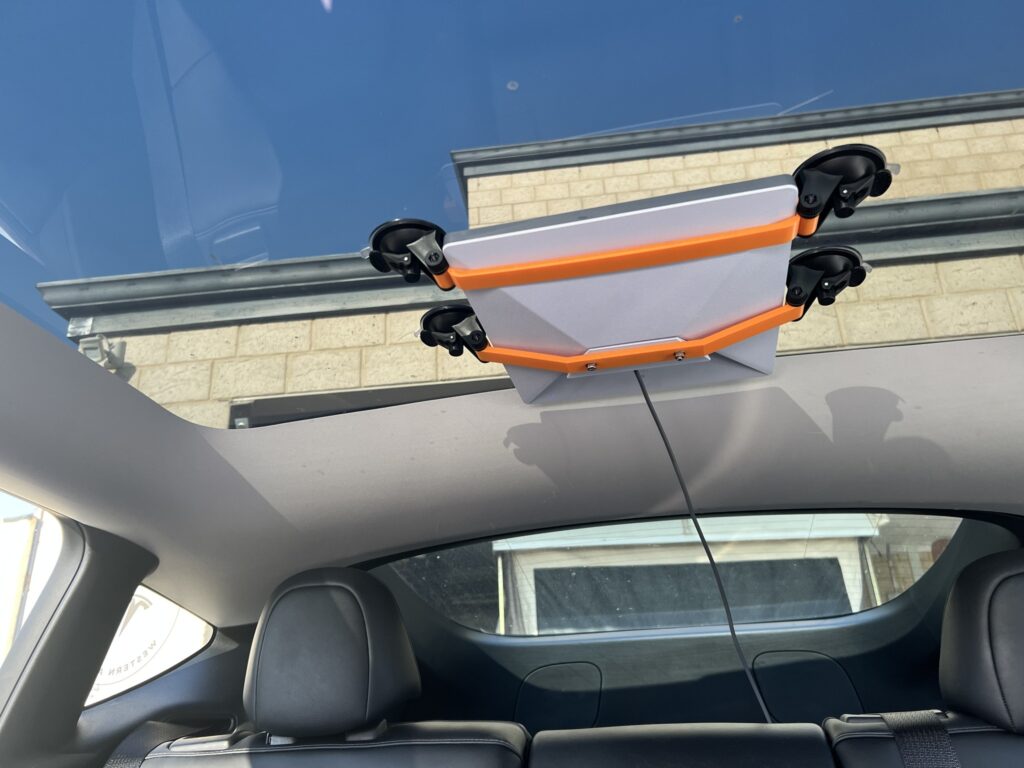
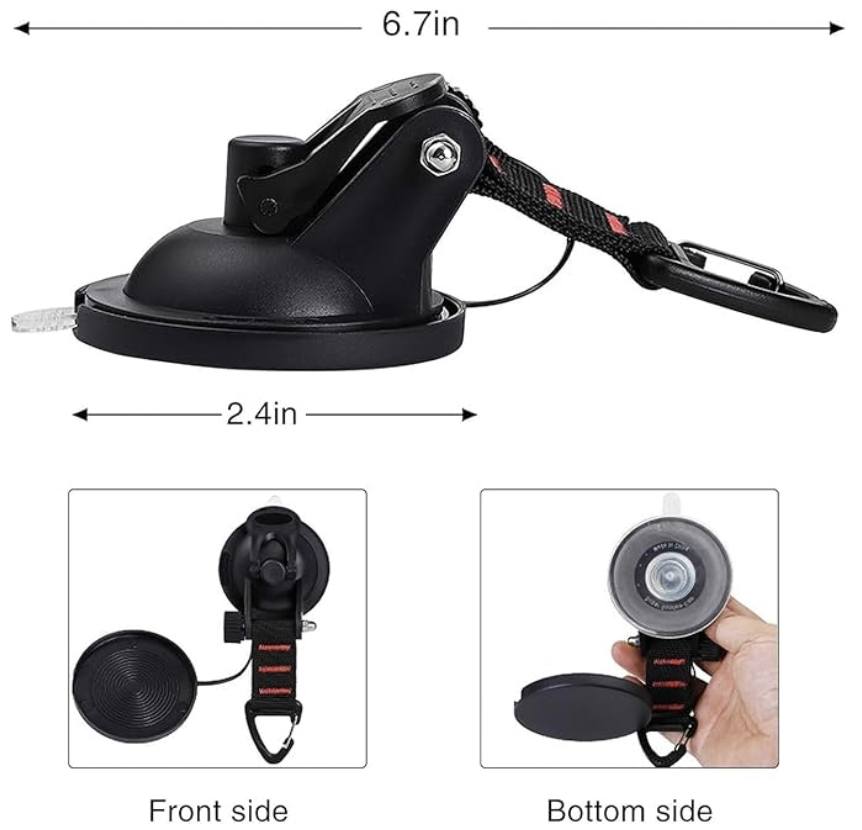
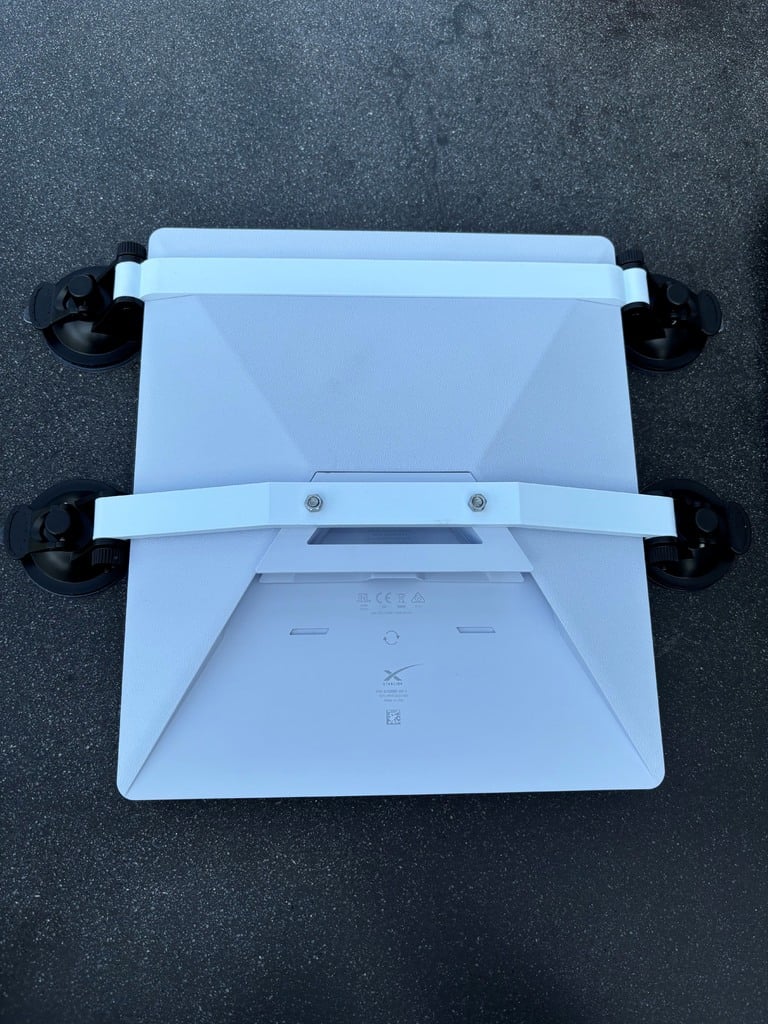
To make the setup even better, we purchased a Starlink-specific waterproof USB-C cable for outdoor use when camping. As I have access to a 3D printer, I used SDeath’s suction cup mount design from Thingiverse and paired it with suction cups from Amazon. This allows us to easily secure the Starlink Mini to our car’s glass roof, and it has enough airflow between the glass and starlink to stay cool thanks to the airconditioning in the car. On the road, we’ve been consistently getting around 100 Mbps, even at high speeds.

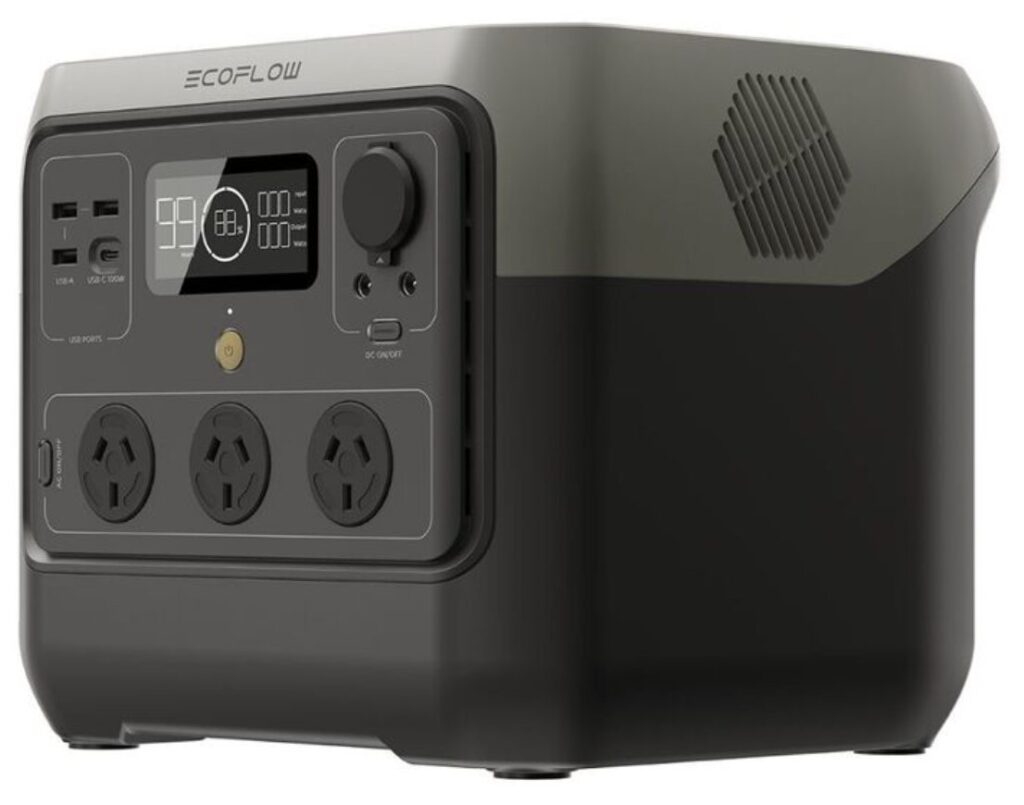
One issue we ran into was the Starlink shutting off when the car’s 12V system cycles during starts and stops. To fix this, we added an EcoFlow River 2 Pro. It’s a bit overkill with 800W, but it’s been perfect for running our Starlink and a travel fridge when off-grid and it was on a 30% off at the time so cheaper than the smaller bluetti we had our eye on. The power pack charges via the car and provides uninterrupted power for Starlink. You could use any power pack (much smaller and cheaper ones) with 60W USB-C PD output, but we liked this one for its versatility.

We’ve tested this setup on WA’s wide-open roads without any signal issues, and I’m keen to see how it performs on more challenging terrain like the Great Ocean Road and Tasmania.

Links to the products we have used:

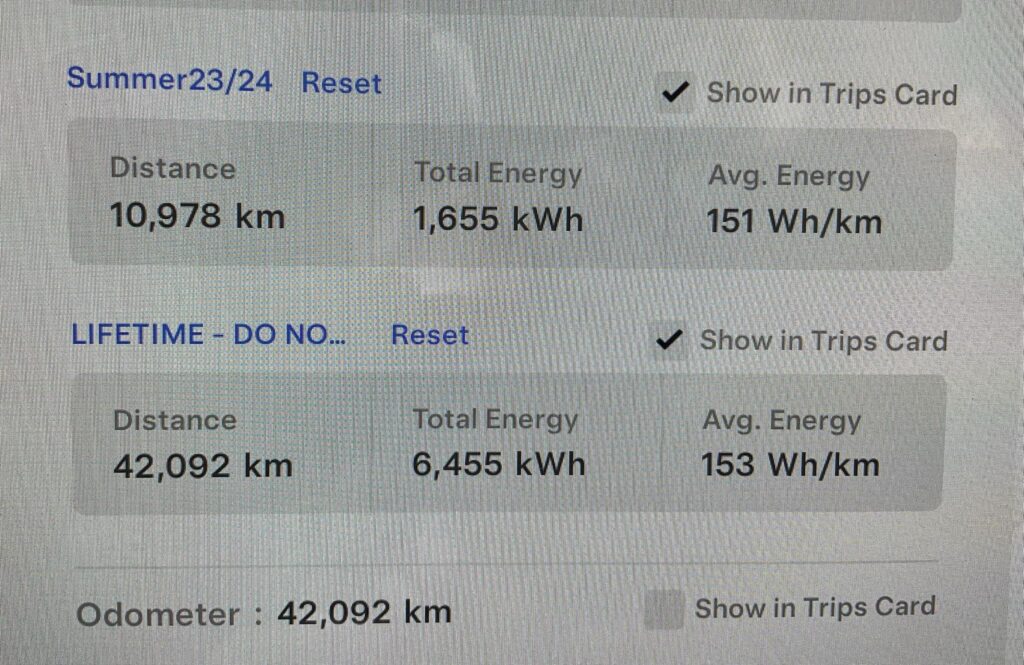
Is a Tesla more efficient in Summer? Yes but it’s a two edged sword.

The climate in the southern half of Western Australia is near perfect for a Tesla, warm and dry most of the time and winters where the temperature only drops below 5C for a few hours on the occasionally early morning, if you enjoy getting good Wh/km efficiency WA is the place to achieve it.

On the downside is the long hot summer of constant intense sunlight and high temperatures, this doesn’t generally harm the Wh/km figures recorded during longer drives but does put a serious dent in efficiency for those driving short (less than 15km) trips after being parked in an exposed area for even a short period during the day. Every time you drive off in a car with a hot interior the aircon is working hard to reduce the temperature, depending on conditions that could take anything from 10 to 30kms.

Teslas have an excellent feature known as cabin overheat protection, even on a 30C day this will consume up to 4% of the battery over 9 hours, personally I’ll happily accept a 4% loss each day over Summer but anyone who is not is free to turn cabin overheat protection off. Of course if car park designers who have a fetish for destroying trees allocated funds for solar panel canopies car parks wouldn’t be so hot.

So are all these hot Summer days killing your range?
Not really, it’s consuming far more energy between each charge but as this is caused by short drives and long parking sessions it’s not relevant unless you’re buying expensive electricity. Range is only a factor on very long drives away from reliable fast charging. When you go on a long drive the heat will have little effect on your Wh/km efficiency (it helps if you pre-cool the interior while plugged into shore power before departure).

Hot tips for a cool interior
Try to park in the shade even if it’s a 200 metre walk to your destination.
Get interior shades up, especially over the black dashboard.
Pre-cool the interior using the phone app about 5 minutes before arriving at your car.
If only parking for 45 minutes or less put the car in “keep” mode, this leaves the air-conditioner on and does not use any more energy than letting the car heat up then cooling it down again.

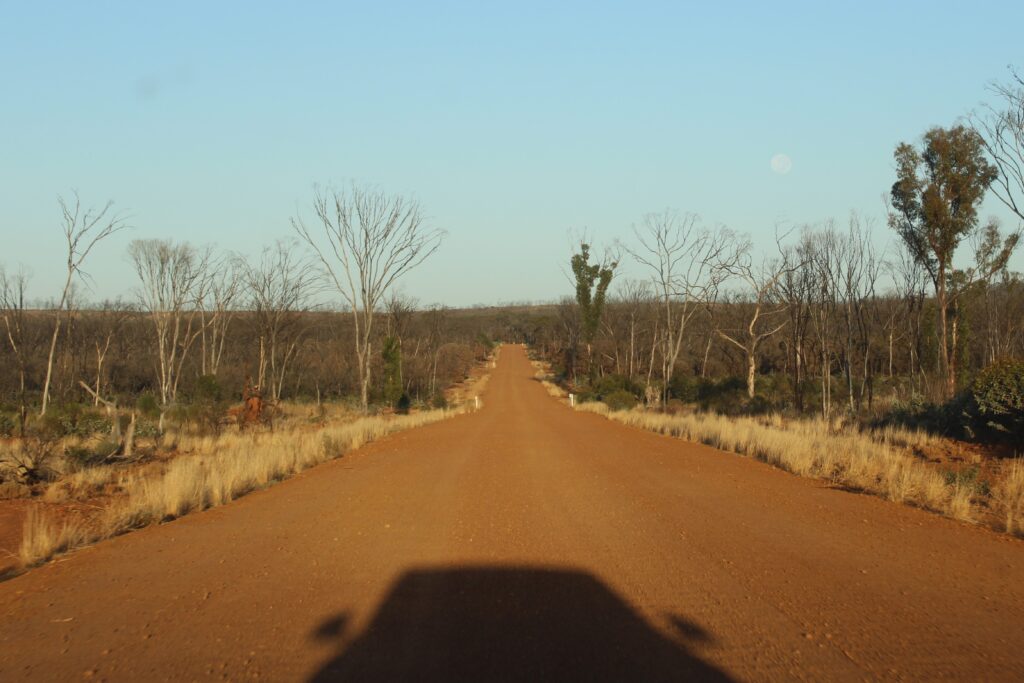
Driving the Norseman to Hyden Unsealed Road

A word of caution first, despite being continually maintained by the shires of Dundas and Kondinin any medium to heavy rain could make this road difficult to navigate in a couple of sections. Always check the yellow road condition signs before planning any departure. The weight limit is 5 tonnes although you will likely see some heavy haulage servicing the handful of mines along the road.

Officially the drive is 297kms but it’s best to use the distance of 299kms between the Norseman and Hyden DC chargers.

Is it worth taking this route?
Although this direct route is 88kms shorter than driving the sealed road via Coolgardie and Merredin the total driving time will be no more than 10 minutes difference, driving the Norseman-Hyden road is more of an adventure plus a break from the constant flow of fuel tankers and over size mining equipment travelling being Perth and Kalgoorlie.

When to drive it?
This is an early morning road, firstly there’s almost no other traffic, secondly it’s cooler when you stop for photo opportunities, thirdly if an issue arises you have a full day of daylight ahead to sort it out.

What to carry?
The normal common sense equipment including plenty of water. A spare tyre is a must, if you depart Norseman or Hyden with anything less then you’re taking an unnecessary risk that will end up costing you a lot of wasted time and money.

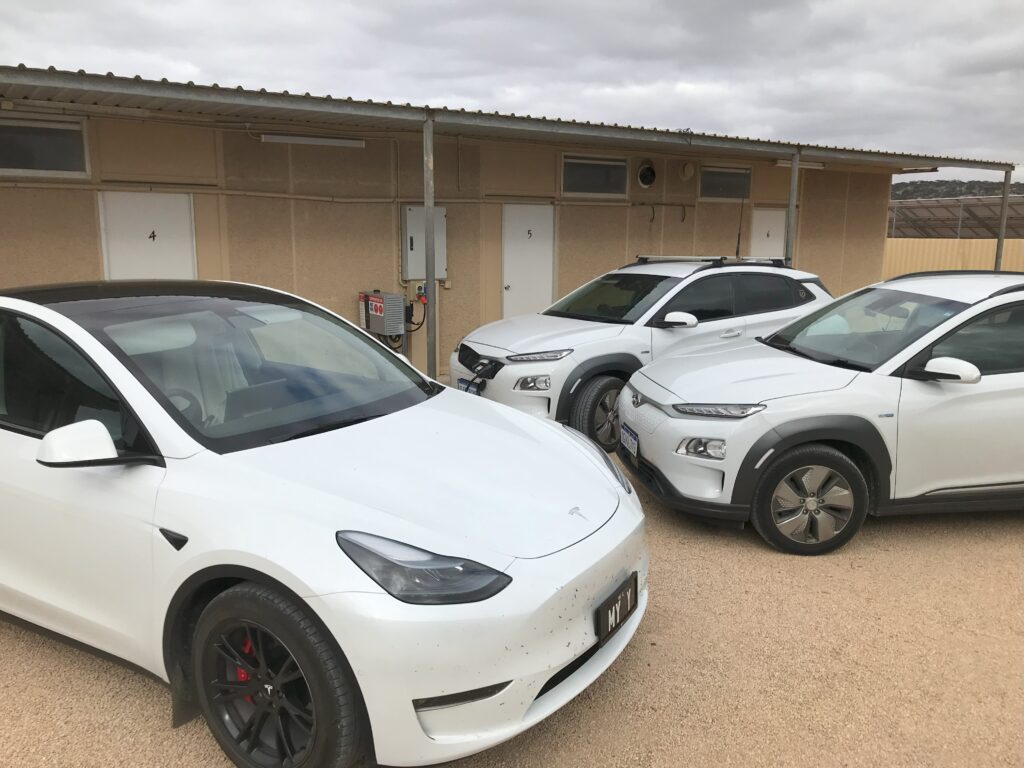
To cover the 299kms with the focus on enjoying the scenery rather than constantly monitoring efficiency I recommend a standard range Tesla charge to 98% and a long range Tesla charge to 90%. Unsealed roads consume more energy than sealed roads at the same speeds, on our recent trip our Model Y consumed 45kWh at an average speed of 75kmh.

On departure from Norseman Tesla navigation will direct you to drive north towards Coolgardie for approximately 8kms before taking a left hand turn towards Hyden, a better option is to drive south from the DC charger towards the Norseman town centre, turn west on to Ramsey Street which then continues on to become Mort Haslett Drive, this takes you across Lake Cowan via a gravel causeway, thus providing some excellent photo opportunities. Continuing on for another 15kms will join you up with the Hyden Road via a T-Junction.

At the 103km mark is a handy stop called Lake Johnston, this location has basic toilets, picnic benches and shady trees, up until now the only other traffic you’ll likely see is the shire of Dundas employees maintaining the road. This first 103km section we comfortably sat on 70kmh keeping in mind there were still some early morning Roos on the road.

From Lake Johnston onwards the road has straight sections far into the distance, 80kmh was easily maintained right through to Marvel Loch-Forrestania cross road, don’t forget to keep heading west at this point. You’ll notice new power lines for the nearby mine site plus some large areas of cleared scrub acting as a fire break, from this point on the Norseman-Hyden road becomes some of the best quality unsealed surface you’re ever likely to see. Approximately 63kms from Hyden the sealed road begins, continuing all the way to the Hyden DC charger.

Our recent drive took us just over 4 hours with a few short stops along the way, potentially it could be driven faster than that but it’s better to allocate 5 hours and enjoy a 20 minute visit to Lake Johnson plus a few 5 minute photo stops on the way.

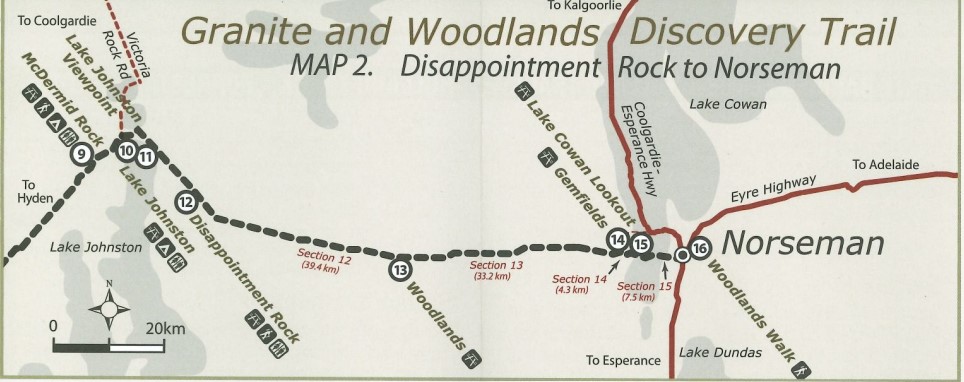
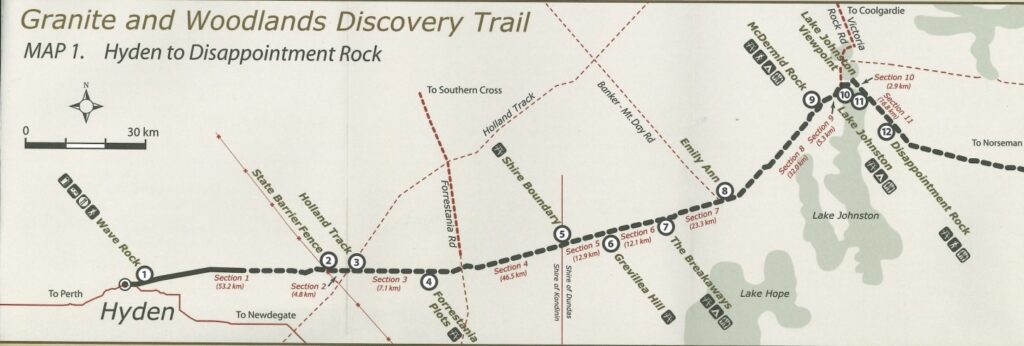
Check out the Granite and Woodlands Discovery Trail for more information on the route.

Using the Delta chargers across the Nullarbor

The four Delta 22kW DC chargers located between Norseman and Ceduna were crowd funded by the Australian EV community in two stages, the first two in early 2022 and the recent two in December 2023. Although nowhere near as fast as the hard wired DC chargers at locations such as Norseman and Streaky Bay in SA the Delta DC chargers are a reliable solution until government funded fast DC is rolled out from late 2024 onwards.

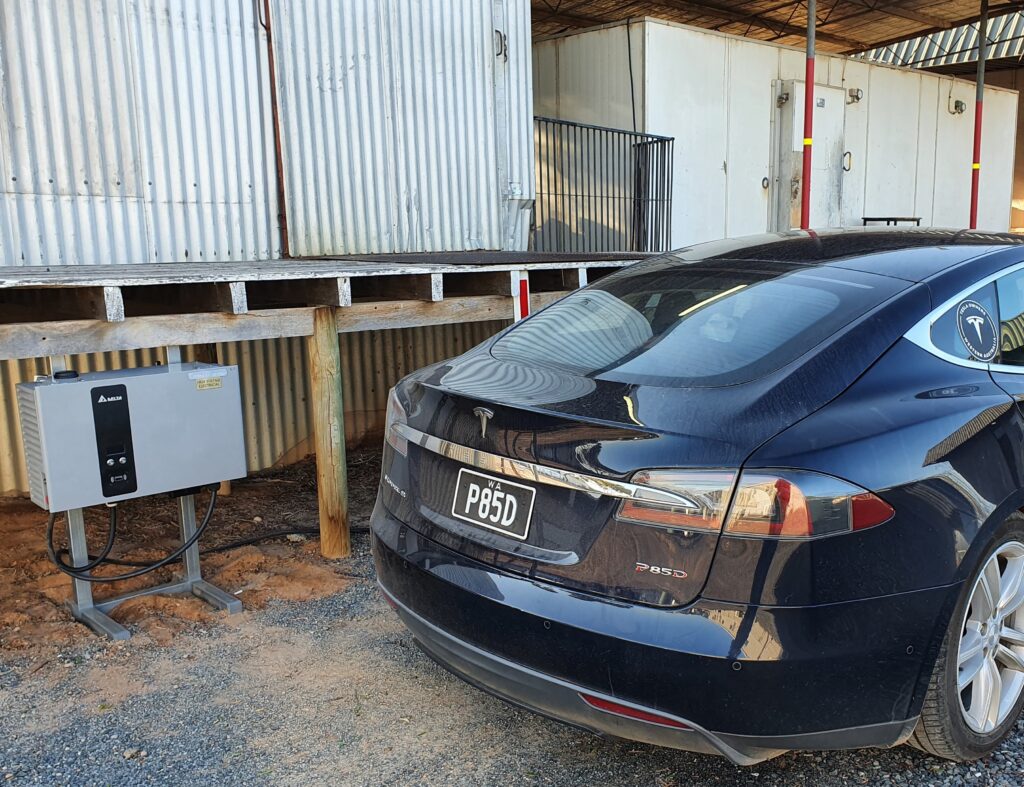
Despite proving to be very reliable the Delta chargers require patience and methodical following of the instructions or users will find themselves wasting valuable time. I’ve used these four chargers a combined total of 18 times in less than 2 years, heed my advice to save yourself a lot of frustration.

1. Only plug in when the charger LED screens displays “connect to EV”, plug in firmly and don’t have a stretched cable.
2. Check charging has started, if the car displays “charging stopped” unplug, close the charging port and reconnect when the charger displays “connect to EV”.
3. Once charging has clearly started check back in after 5 minutes, if charging stops it’s highly likely to be in the first 5 minutes. I’ve never had a charging session stop after 5 minutes but that’s not to say it won’t happen, if you have phone coverage use the app to check every 30 minutes or so.
4. Don’t sit in the car with the aircon running while connected to 22kW or slower charging, it consumes valuable power that should be charging the cars battery, if you want aircon comfort sit in the Roadhouse Cafe.
5. Be thoughtful how you park, all 4 locations are in areas with other activities going on, look around and consider if you may be blocking access and potentially getting your car scratched by a room service trolley.
6. If you’re planning to stay overnight DO NOT leave your car plugged into the charger ready for the morning, there’s only one charging option at each location, leave the charger accessible for other EVs.

Balladonia
If you’re wise you would have charged to at least 98% at the Norseman 150kW DC charger (if driving east), every 6 minutes at Norseman saves you 30 minutes at Balladonia, and a few dollars.
To speed up the process at Balladonia get the passenger to jog in to the Roadhouse Cafe and ask for the EV charger key while the driver parks around the back. Once the key switches on the charger the start up process takes approximately 90 seconds, a good opportunity to get shade on the car.
At the end of the charging session and just before charging stops use your phone to take a photo of the kWh consumed on the Delta LCD screen, make sure the photo is readable for the Roadhouse staff. Don’t forget to return the key when paying for charging.

Madura Pass
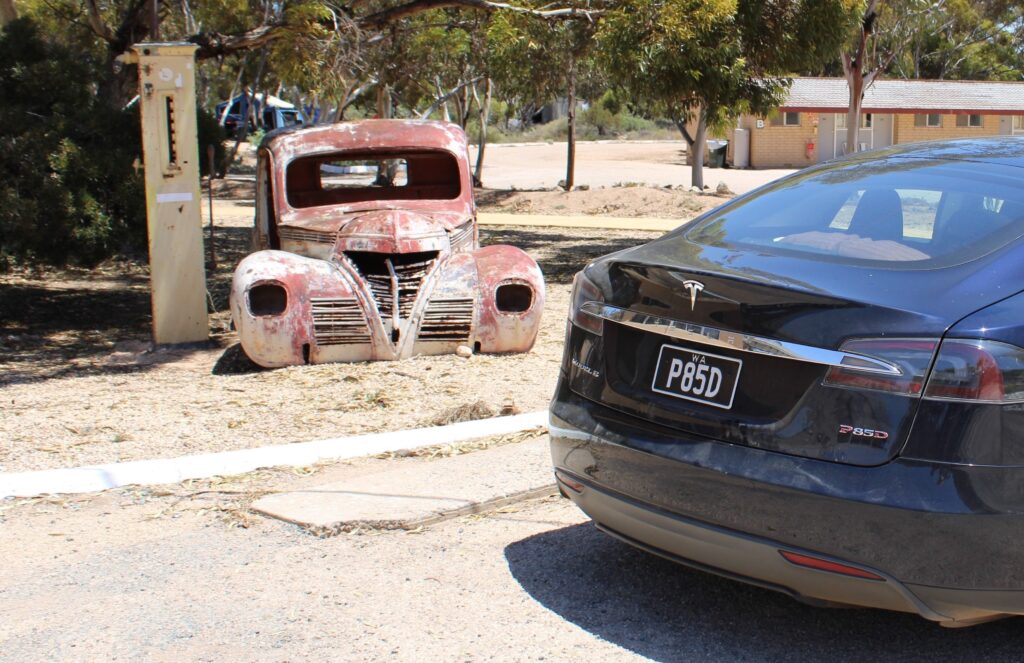
Park in front of the rusty vintage car and request EV charging in the fuel shop, a staff member will wheel the charger in to position and instruct you where to park, if you’ve parked in front of the vintage car you’ll only need to reverse up a few metres. Payment is to the RFDS in the fuel shop. Opening hours are strictly 7.00am to 5.00pm AWCT.

Mundrabilla Roadhouse
The Delta charger is located inside the accommodation compound on the western side of the Roadhouse building, in the middle of the day parking is easy but before 8.00am and after 3.00pm you’re likely to have to deal with vehicles parked in front of the rooms, it’s wise to reverse park so you won’t get blocked in. This charger is switched on ready for immediate use.

Nullarbor Roadhouse
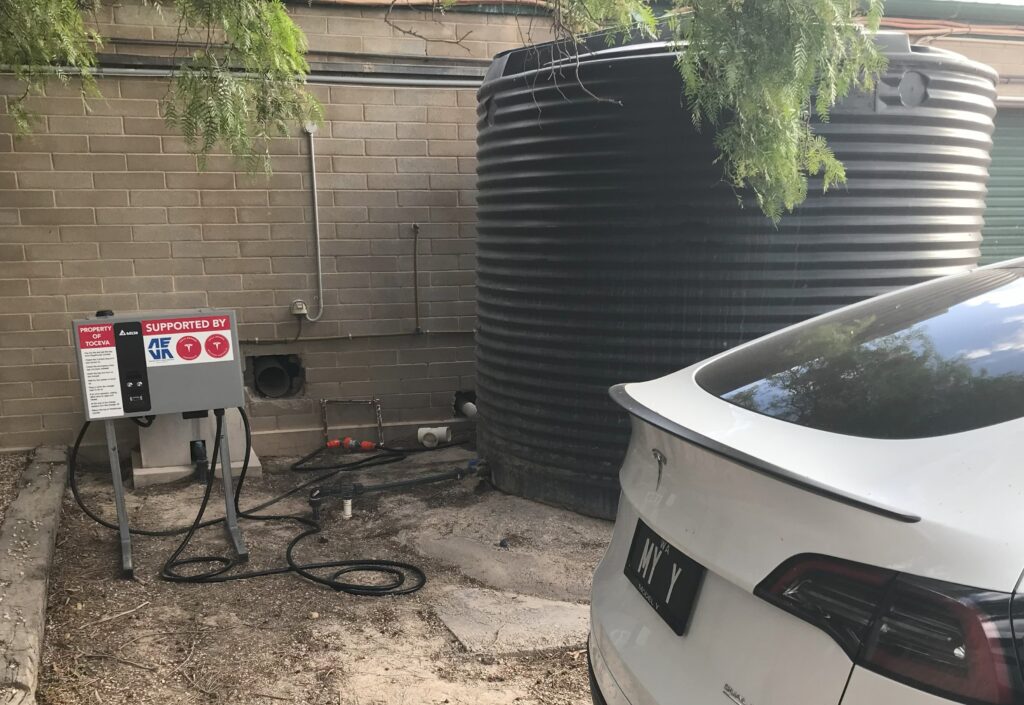
The Delta charger is at the rear of the laundry on the western side of the building, reverse parking with the black water tank on your passenger side will provide morning shade as well as not block the laundry ramp. This charger is currently kept switched on so connection to the car is almost immediate. At the time of writing a fixed payment is made at the cash register and your receipt must be clearly displayed on the car dashboard whilst charging.

I hope this information assists you to have smooth and happy travels whilst crossing the Nullarbor.

Perth to Shark Bay is now an EV Cruise.

Now that the WA EV Network DC charger at the Overlander Roadhouse is available to the public the biggest gap between DC charging on the Perth to Shark Bay drive is 228 kms, once the Billabong Homestead DC charger goes live that gap reduces to 182 kms. This makes the 848 km drive (to Monkey Mia) a comfortable one day drive during the daylight hours of winter, it also means a standard range model Y could drive that trip at the speed limit while keeping the battery level between 20% and 85%. Take note, there’s no harm to the battery by going below 20% the potential issue could be queuing at a regional DC charger with no sentry mode available.

Northampton WA EV Network DC charger

Below is a suggested plan for those in a standard range vehicle, if you have a LR or Performance use the same plan but with a lower charge percentage when departing each charging stop. Plan for 9 hours of driving plus 90 minutes of charging spread over 3 or 4 charging sessions.

Jurien Bay, peak charge speed 115 Kw.
If your trip is on the weekend or holiday period depart early. Although this trip can be done in daylight hours a 6.00am departure will pay dividends at the first charging stop in Jurien Bay. Why? Because humans are ruled by their stomachs, it’s a sure bet that on a Saturday morning or School holidays the Jurien Bay chargers will have a queue while the passengers stretch out morning tea. Trust me, you really don’t want to get stuck behind a couple of short range legacy EVs trickle charging to 100%. Get going early and get ahead of the grazing sheep.

Geraldton and/or Northampton, peak charge rate 115 Kw.
The next charging stop is Geraldton so 80% is plenty to cover the 200 kms. Once you get close to Geraldton you have a decision to make, do you bypass Geraldton and push on another 52 kms to Northampton DC charger thus avoiding some of the Geraldton traffic or play it safe and “Always Be Charging”? This is up to you depending on how busy you think Northampton could be, keep in mind Geraldton has the capacity to charge 4 EVs at once, Northampton it’s only a 2 EV site.

The drive from Northampton to the Overlander Roadhouse is the biggest gap of 228 kms, even at 110 kmh in poor conditions a standard range could still drive this on 65% battery but the trick here is to keep charging until the charging rate drops below 45 Kw, this will generally be at approximately 85% on a standard range battery pack. Why is 45 Kw important? That’s the average charging rate you’ll get at the Overlander on the WA EV Network 50 Kw DC charger.

Little Lagoon Shark Bay

The drive between Overlander and Monkey Mia may only be 154 kms but has caught out many impatient EV drivers in the past, it’s a sure bet that sometime after lunch a strong westerly will blow significantly reducing range, don’t get caught short, add 154 kms of range plus a 20% buffer so your not hypermiling into Shark Bay after dark.

Foot note: Lancelin has both Tesla Superchargers and a WA EV Network charger, this is an optional stop on the way north on potentially busy days or if you’re not in a hurry and don’t mind the total 13km detour. Be aware that if you take this option and bypass Jurien Bay you’ll need to add enough charge to drive 303kms to Geraldton.

Model Y Tyres: be one step ahead to keep the costs down.

I’m hoping the instances I’ve seen in the past week with regards to uneven tyre wear on 2023 WA based Model Ys is just pure coincidence rather than being widespread across the Australian fleet, in saying that it’s best to be prepared by spotting any uneven wear early and booking the vehicle in for a check and alignment.

How can you spot an issue early?

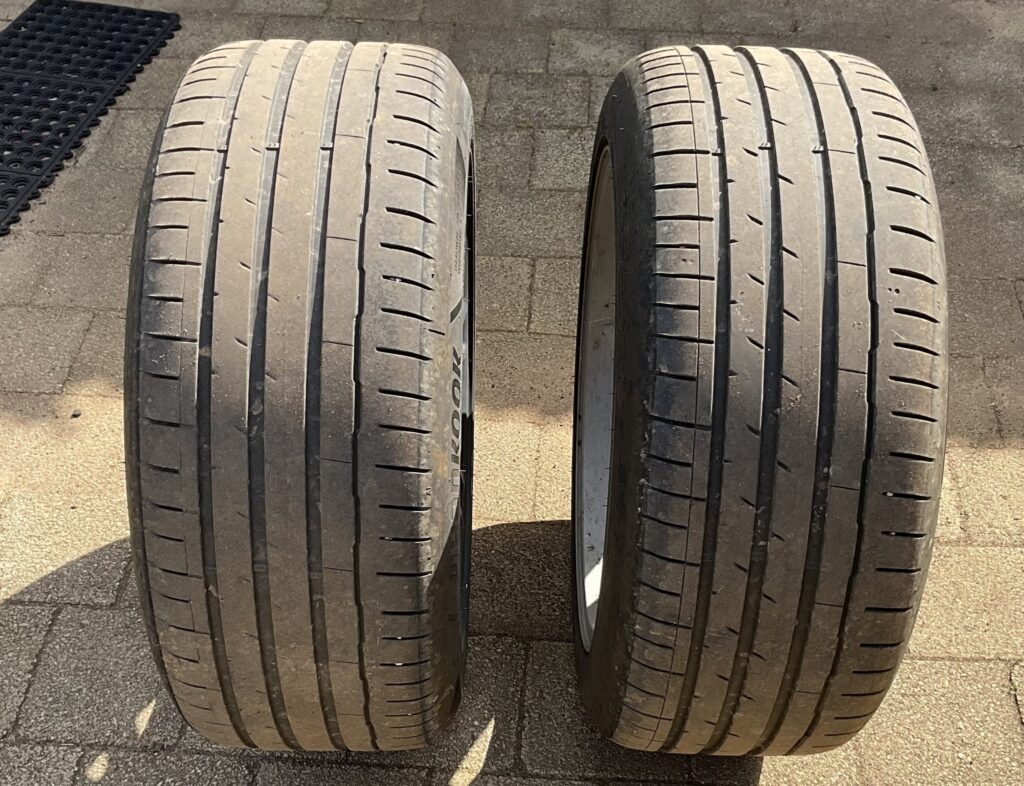
If you look at the tyre surface from the front or the rear it can be very deceptive, tyre wear may look very even across the tread and wear on the outer edge is fairly easy to spot. On the other hand wear on the far inside edge is almost hidden until it’s too late, that’s why getting a tyre rotation or inspection done 10,000kms after delivery is well worth the effort. Taking the wheel/tyre off and rolling it slowly while carefully checking the surface will show up any early signs of uneven wear.

Check the inner edges when the tyres are off.

Why bother?

If a looming safety issue doesn’t sway you to be vigilant maybe some basic arithmetic  will, a 19inch tyre on a Model Y that has even tyre wear throughout its life should survive for at least 50,000kms, if you don’t correct uneven wear early the tyre is likely unroadworthy at 30,000kms, that’s approximately $800 worth of tyre tread wasted. For those vigilantly counting every cheap kWh of electricity you charge your Tesla with you may be wasting more on tyres per km than you’re spending on electricity per km.  If you have a Model Y with higher priced Pirellis it’s closer to $1100 wasted.

Fitting new tyres

Hopefully you get even tread wear and a high km lifespan out of original set of tyres but eventually they’ll need replacing. Unless you can find a compelling reason to change brands I’d recommend sticking with a similar Hankook 19, Michelin 20 or Pirelli 21 that Tesla factory fitted, often keeping it simple is the best method.
Without doubt most Model Ys in WA will be fitted with 19inch Hankook Ventus EvoS1 (255/45/19) I recently got a quote for these at $499 each, that’s reasonable but I highly suggest you make enough phone calls to get not only a competitive price but a tyre shop that will respect both you and your car.
Hankook have also recently introduced a similar tyre specifically for Electric Vehicles called the Ion AS, in the 255/45/19 size I received a quote for $539 each.

I’m sure you’re asking this question; “Is an EV specific tyre marketing BS?” The answer will be revealed soon as one of our members is currently putting the Hankook Ion tyres through a thorough long distance test across the top end of Australia.

In summary:
Keep a constant check on your tyres, it only takes two minutes while the car is on charge.
Correct the reason for uneven wear ASAP.
Phone around for competitive tyre prices in the weeks before you need new tyres not on the day you find your car unroadworthy.

A Tale of Two Motors

Test Number 2

After seeing the results from test number 1, How much do 19 inch tyres and wheels improve the performance of a Tesla Model Y, it was decided to do a second 272 km test (along the same route) between the same Model Y Performance with 19 inch Gemini wheels and tyres and a Standard Model Y with exactly the same wheel and tyre set-up.

The clear difference between these two vehicles is their drive units. The Performance Y has dual motors with a maximum of 393kW power, whereas the Standard Y has a single motor producing a maximum 194kW. The Performance Y is 88kg heavier than its standard range stable-mate due to a combination of different-sized battery packs (and chemistry difference) and the extra weight of its additional motor. The operating parameters of the two cars were identical with tyre pressures set to 42 psi cold, air conditioners set to 22°C and the same number of occupants in each car. You can read in the initial test all the steps taken to obtain an untainted result.

Model Y
Performance
19″ Gemini
Model Y
Standard
19″ Gemini
Leg 1
31km
206Wh/km198Wh/km
Leg 2
105km
164Wh/km165Wh/km
Leg 3
105km
153Wh/km156Wh/km
Leg 4
31km
98Wh/km105Wh/km
Total
272km
157Wh/km158Wh/km

Test start 9.05 am, completion 12.42 pm. Weather, clear skies temp 13 – 20°C. Moderate wind from the same direction for the whole test which reflects in the result for Legs 2 & 3.

Please note the Performance Y once again recorded a total trip of 271 km over a 272 km journey, the other two test cars both recorded 272 km.

Although the Performance Y is heavier than the Standard Y and also has a second drive unit which slightly adds to mechanical friction losses, these disadvantages are likely compensated for by it being about 14 mm closer to the ground. Since reduced ground clearance enhances efficiency at higher speeds, a test in stop/start city conditions would likely slightly favor the Standard Model Y.

Which is the best Model Y variation?

First up the Performance, Long Range and Standard variations of a Model Y all have the major reasons to buy a Model Y in the first place: Excellent internal storage space considering its outside dimensions, good rear seat legroom, comfortable upright front seats, a high level of safety for occupants in a crash, all can legally tow 1600kg with trailer brakes, the most efficient pure electric drivetrain for its size and weight, and lastly but most importantly full access to the best and most reliable charging infrastructure in Australia, that being the Tesla Supercharging network.

The Performance Model Y
$101,564 on road in Western Australia (as of 17/02/2024)
Check Tesla website for current pricing
74.5kWh usable NCA battery pack
514kms WLTP
Genuine range on coarse country roads 408kms.

This variation has the additions of dual electric motors, performance brakes, slightly lowered suspension and a few cosmetic additions, it also has a track mode setting if you can find a safe controlled track to let the car off it’s leash.
The Performance is brutally quick when required, the brakes are extremely good and the 21 inch wheels with Pirelli Pzeros look fantastic. Unfortunately the 21s are the only wheel/tyre combo available, these consume a lot of energy. If you’re happy to drive in the Albany-Perth-Geraldton corridor the 21s are fine, if you have plans for long country trips away from reliable DC charging you will have to drive with a bit more caution.

Long Range Model Y
$86,484 on road in Western Australia
74.5kWh usable NCA battery pack
533kms WLTP
Genuine range on coarse country roads 464kms with 19 inch wheels

This variation is often referred to as the sweet spot; Dual electric motors, very good acceleration, the longest range battery and priced so it does receive some tax breaks for business folks. It also has the choice of 19 inch Gemini wheels or 20 inch Induction wheels ($2400+tax), the Induction wheels will reduce range slightly so my advice would be to option the Geminis and purchase a $300 set of Induction wheel covers for city driving and refit the Gemini hubcaps on long trips away from reliable DC charging.
My guess is the LR will outsell the Performance by a margin of 5 to 1 in Australia, especially to those that think range anxiety is real. If I lived in a WA country town or towed a trailer more than 1000kms on a regular basis I’d consider the Long Range Model Y.

Standard Model Y
$72,639 on road in WA
(eligible for $3,500 state Government rebate – if no options)
57kWh usable LFP battery pack (the Ricky Gervais pack)
455kms WLTP
Genuine range on coarse country roads 370kms with 19 inch wheels

Despite having good sales already in WA this rear motor only variation is still massively misunderstood amongst the public, it may be the “slowest Tesla ever” with a 0-100kmh time of 6.9 seconds but the critically importantly 80-120km acceleration is plentiful. It may have the smallest capacity battery pack but it’s LFP chemistry means the battery pack is far more flexible, the LFP is very happy being charged to 100% on a weekly basis (even daily if you “just don’t care”), it may not charge faster than 170kW like the NCA packs but the LFP has a flatter DC charging rate that is less confusing to new owners.
Take note: The three fastest pure EV trips around Australia took 14, 16 and 17 days. All completed in Standard Range Model Ys.

As each month passes and reliable DC chargers installations increase around Western Australia the more the Standard Model Y will be able to travel without compromise. If you live in the Perth-Albany-Augusta triangle and don’t care about brutal acceleration or all wheel drive traction the Model Y Standard is the best choice of the 3 variations.

How much do 19 inch Gemini Wheels and Tyres improve the Energy Efficiency of the Model Y Performance?

The only way to correctly test energy efficiency is by having two similar cars driven on the same roads at the same time over a reasonable long distance.

This test was conducted using two almost identical 2023 White Model Y Performance vehicles built in the Shanghai factory within days of each other. Both had covered over 1,600kms in the first week of ownership. Both had aircons set to 22°C. Both had cold tyre pressures of 42psi. Both had two occupants. It is crucial to note that neither car used the Williams Supercharger to navigate to and thus battery preconditioning was NOT used to avoid contaminating the results. During the test, the cars were driven no closer than 60 metres at highway speeds with the biggest gap being approximately 400 metres. Each car drove the front position for half the journey.

Cars were driven at the speed limit (max 110km/h) as much as possible with overtaking of slower traffic only conducted on designated overtaking lanes. Luckily traffic flow was generally good during the whole test.

To be clear, the test was conducted mostly on the Albany highway, a coarse road surface that’s consumes plenty of energy and is often used by Tesla drivers visiting the Great Southern.

Over the total 272km test (136kms south, 136kms north), the Performance model Y with factory fitted 21 inch Überturbines averaged 178Wh/km while the Performance model Y with the 19inch Gemini rims and hub caps (acquired from a new standard range model Y) averaged 158Wh/km, an improvement of 11%. That’s not a typo, that’s eleven percent with every other aspect of the two cars being identical.

There’s two main factors that cause the difference in energy efficiency: The 21inch Überturbines have what could be described as “sticky” Pirelli tyres, great for putting down the power and torque of the dual electric motors under extremely hard driving, but energy hungry in general driving. The 21 inch wheel/tyre combo has less smooth tyre surface and more rough wheel surface on the outside of the car. The Gemini wheels have more smooth tyre surface and a fairly smooth hub cap so airflow at higher speeds is less interrupted. If you’re a City Slicker, the 21 inch Uberturbines are fine. If you plan on long distance driving away from reliable DC charging, the energy wasted may be an issue.

Model Y
Performance
21″ Überturbines
Model Y
Performance
19″ Gemini
Leg 1
31 km
212Wh/km195Wh/km
Leg 2
105 km
168Wh/km149Wh/km
Leg 3
105 km
200Wh/km175Wh/km
Leg 4
31 km
105Wh/km95Wh/km
Total
272km
178Wh/km158Wh/km
TOCWA Note: Distance per Leg is approximate
  • Leg 1: Byford to Albany Hwy T junction. Moderately uphill, average speed 64 km/h
  • Leg 2: T junction to Williams Woolshed Supercharger. Moderately downhill, average speed 97 km/h
  • Leg 3: Return Williams Woolshed to T junction. Moderately uphill, average speed 102 km/h
  • Leg 3: T junction to Byford. Moderately downhill, average speed 71 km/h

Conditions: dry 22°C to 29°C, light winds. Start time 9.30 am, finish 1.15 pm.

Überturbines (left photograph), Geminis (right photograph). Both “Since Charge” screens did not reset to zero as per normal after Supercharging???

This test was conducted by Harald Murphy and Rob Dean, two of the most experienced long distance drivers in Australia.